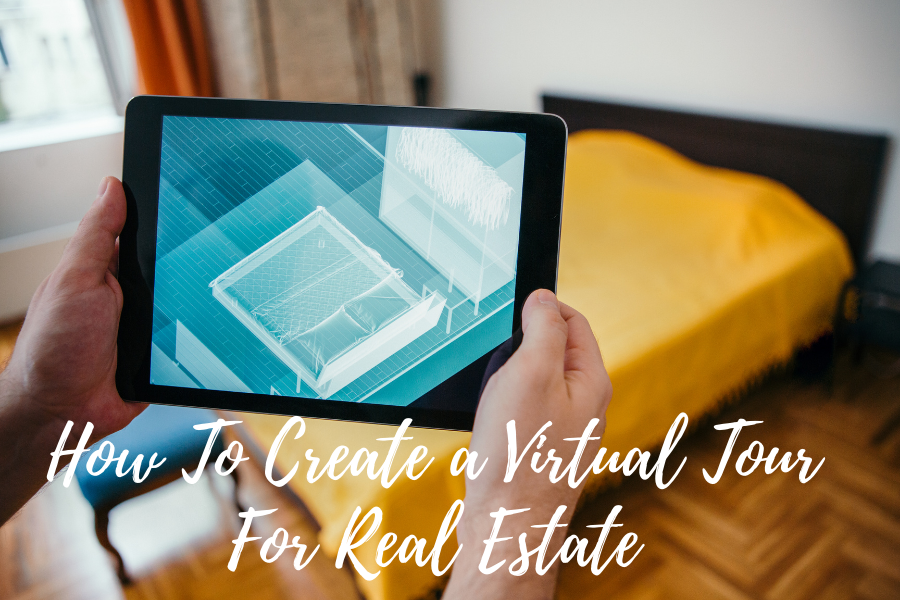
9 Steps to Create an Awesome Virtual Tour

- What makes an engaging virtual tour for real estate?
- Choosing the Correct Software & Equipment
- Prepare Your Shots
- Stage Each Room
- Make Sure Tripod Is Level
- Test Each Shot
- Take All Photos On Your Image List
- Create Your Virtual Tour
- Where to Share Your Virtual Tour
- 1. Choose the Right Equipment & Software
- 2. Plan Your Shots
- 3. Stage Each Room
- 4. Level the Tripod
- 5. Take Test Shots First
- 6. Take All Photos on Your Image List
- 7. Create Your Virtual Tour
- Upload Images to Software
- Add Extra Features
- Don’t Be Afraid to Outsource
- 8. Share Your Virtual Tour
- 7 Software Options for Making a Virtual Tour
- What Is a Virtual Tour?
- Video Walk-through
- 3D Virtual Tour
- Interactive 360-Degree Virtual Tour
- Bottom Line:
- LET’S KEEP IN TOUCH!
A multimedia tool that replicates the experience of visiting and walking around a property is a virtual tour. Digital tours, such as video walkthroughs, 3D virtual tours, and 360-degree immersive virtual tours, allow prospective buyers to engage with the home and look at features in detail without having to be on-site, and along with listing images and floor plans have become the standard. In order to sell their listings to out-of-town customers, agents use virtual tours, minimize the number of in-person showings, and set their listings apart from the competition.
In this post we will talk about how to create a virtual tour for real estate.
What makes an engaging virtual tour for real estate?
Here’s what a virtual tour needs to include to actually be a virtual tour and not simply a listing video or slideshow:
- A real view of the home — not a recreation or rendering
- Smooth navigation that makes it easy to move to different rooms and pan 360 degrees
- Ability to walk through, go back and freeze the frame
- Clear and high-definition picture
- Shots free of clutter and personal items
- Highlights of the home’s best features, including unique amenities and outdoor spaces
- Each capture taken from the best vantage point to show the room in its entirety
- Compatibility with all kinds of devices — desktop and mobile
Choosing the Correct Software & Equipment
One of the reasons many agents resist virtual tours is because they believe they need complex, high-end equipment for photography. You need a panoramic or 360-degree camera in fact, which is more affordable and user-friendly than ever before. To create virtual tours on a regular basis, agents should consider purchasing one. Select a provider of virtual tour software and check whether they sell their own cameras and lenses or a camera purchase discount.
Look at the best 360-degree cameras on the market for in-depth reviews; compare costs, features, resolution depth (higher is better), stabilizer options to avoid blurred images, battery life, and remote operation. Buy or rent a camera that provides you with the functionality you need for the type of virtual tour you want to make.
Best 360-Degree Cameras


Prepare Your Shots
Create a list of any room you want to include in your virtual tour of the building. Walk through each room, locate the middle, and make sure that from that vantage point your camera will be able to capture and highlight the features of each room. Find a place where your camera can pick up most of the detail and mark the location with a piece of tape if the center doesn’t work. Create your shot list by entering each room’s name or by filling in a template with a preprinted shot list.
Stage Each Room
Now that you know where you plan to set the camera, you need to make sure the room looks as perfect as possible. Remove anything that stands in the way of the lens, ensuring that the camera will have a clear view of the entire room. Take anything out of the room that might make it seem messy or distract buyers from high-value features. The clearer the view, the better the final result. Be sure the room has enough light so the features are easy to see.
Make Sure Tripod Is Level
In order to ensure that photographs are uniform, the tripod must be level. This applies to any picture you might take, video, 360-degree, or panoramic shot. Without a level place to position your camera, don’t attempt to make panoramic or 360-degree images; otherwise, the lines and angles in your shots will not be straight. You can download a leveling tool to your smartphone if your tripod does not come with a built-in bubble standard. Nivel the tripod until the bubble is balanced between the lines by adjusting the legs.
Test Each Shot
To make sure that you highlight the characteristics you want customers to see, you can test each of the shots on your picture list. Take an in-room test shot and review it. Add more lighting or make changes to compensate if the room looks too dim.
If you see something distracting in the shot, then shift the camera accordingly or place the objects in the room. To make sure that you and your camera do not appear in the photographs as a reflection, be sure to keep an eye on any mirrors, glass, or windows. Choose a different place to stand if you do, while you remotely operate the camera.
Take All Photos On Your Image List
You’ll be able to pass through each room on your image list to take pictures once you decide the correct camera settings. In each room, find the spot you’ve marked, set up your tripod and take pictures. Before moving the tripod, check and picture on the camera screen, retake shots as required, and confirm that you have all the photos you need before moving on to the next space. Better to have too many images than to have too few.
Create Your Virtual Tour
Once you have all of your images, create your virtual tour by stitching images together using the software you chose in the first step.
Where to Share Your Virtual Tour
Your chosen app will include a connection to your trip, which is stored in the cloud once you finish your virtual tour. You will also get a code that allows you to embed the tour on social media pages or websites. You can add this to your website and send traffic to it through Google or Facebook paid ads so that you can simultaneously promote your listing and generate real estate leads. Platforms like BombBomb allow you to send your tour video emails to leads and potential buyers.
In this post we discussed 9 steps to creating an awesome virtual tour for real estate.
A virtual tour is a visual tool that replicates the experience of visiting and walking through a property. Virtual tours, like video walk-throughs, 3D virtual tours, and interactive 360-degree virtual tours, allow prospective buyers to interact with the home and look at features in detail without having to be on-site, and have become the norm along with using listing photos and floor plans. Agents use virtual tours to market their listings to out-of-town buyers, minimize the number of in-person showings, and set their listing apart from the competition.
While virtual tours are a valuable marketing tool, many agents avoid them because creating them can be time-consuming and expensive. Companies like Asteroom solve both problems by offering a simple 3D tour kit for creating high-resolution virtual tours right from your smartphone for about $100. The kit provides tools to turn your smartphone into a 360 degree camera to create tours in 15 minutes. Click below to get started.
Here are the eight steps to make a virtual tour for real estate:
1. Choose the Right Equipment & Software
One of the reasons many agents avoid virtual tours is that they imagine needing complicated, high-end photography gear. In reality, you need a panoramic or 360-degree camera, which are more affordable and user-friendly than ever. Agents should consider buying one in order to create virtual tours on a regular basis. Choose a virtual tour software provider and check if they offer their own cameras and lenses or discounts toward a camera purchase.
Look at in-depth reviews of the best 360-degree cameras on the market; compare prices, features, resolution depth (higher is better), stabilizer options to prevent blurry photos, battery life, and remote operation. Purchase or rent a camera that gives you the features you need for the type of virtual tour you want to create.
Pro Tip: Invest in a stable tripod with a panoramic mount. When you use this essential tool of the trade, the angles in your images will line up when they’re stitched together and your virtual tours will appear much more seamless.
2. Plan Your Shots
Make a list of every room in the house that you want to include in your virtual tour. Walk through each room, find the center, and make sure your camera will be able to capture and highlight the features of each room from that vantage point. If the center doesn’t work, find a place where your camera will pick up the most detail and mark the spot with a piece of tape. Create your shot list by writing down the name of each room or filling in a preprinted shot list template.
Pro Tip: Every room matters to a potential buyer, which is why it’s important to include spaces like bathrooms, walk-in closets, and mudrooms in your virtual tour. Creating a shot list ahead of time can help make sure you don’t forget or leave anything out.
3. Stage Each Room
Now that you know where you plan to set the camera, you need to make sure the room looks as perfect as possible. Remove anything that stands in the way of the lens, ensuring that the camera will have a clear view of the entire room. Take anything out of the room that might make it seem messy or distract buyers from high-value features. The clearer the view, the better the final result. Be sure the room has enough light so the features are easy to see.
4. Level the Tripod
Your tripod must be level to ensure images are uniform. This applies to any image, video, 360-degree, or panoramic photo you might take. Don’t try to create panoramic or 360-degree images without a level place to put your camera—otherwise, the lines and angles in your shots won’t be straight. If your tripod does not come with a built-in bubble level, you can download a leveling tool on your smartphone. Level the tripod by adjusting the legs until the bubble is centered between the lines.
5. Take Test Shots First
You should test each of the shots on your image list to make sure that you are highlighting the features you want buyers to see. Take a test shot in the room and study it. If the room looks too dark, add more lighting or make adjustments to compensate.
If you notice something distracting in the shot, then move the camera or stage the items in the room accordingly. Be sure to keep an eye on any mirrors, glass, or windows to make sure you and your camera do not appear as a reflection in the pictures. If you do, pick a different place to stand as you operate the camera remotely.
6. Take All Photos on Your Image List
Once you determine the correct camera settings, you’ll be ready to move through each room on your image list to take pictures. Find the spot you marked in each room, set up your tripod, and take pictures. Check each image on the camera screen before moving the tripod, retake shots as needed, and confirm you have all the images you need before moving on to the next room. It’s better to have too many photos than too few.
7. Create Your Virtual Tour
Once you have all of your images, create your virtual tour by stitching images together using the software you chose in the first step.
Upload Images to Software
Upload your images into your software program to create your virtual tour. When prompted, go through the steps of adding static or panoramic images. The software will stitch static images together for 3D virtual tours and assemble the panoramic photos for 360-degree tours.
Add Extra Features
In most software, you can add features to enhance the viewer’s experience. These can include an audio description, interactive links aka hotspots, music, or text. Depending on your software choice, click on settings or the edit button to get a choice of extra features to add to your virtual tour. Viewers will be able to back up, zoom, or change directions automatically with their mouse when the virtual tour is complete. This is what it looks like to add hotspots on the iStaging.com virtual tour creator: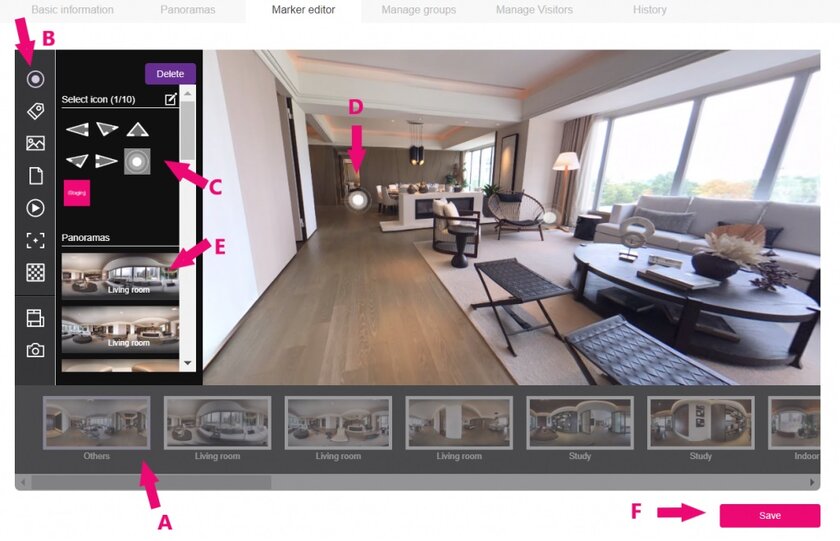
iStaging.com virtual tour creator
Don’t Be Afraid to Outsource
Virtual tour software providers have made the process very simple, but that doesn’t mean every agent has the knack or the time for the post-production process to create the best tour for the property. If that’s the case, another option is to look for a freelancer on Fiverr who can take your images and stitch them together to create a professional final product.
You can also try an online photo editing solution like BoxBrownie to edit images, add virtual furniture, correct lighting, and straighten fixtures before the images are stitched into a virtual tour. Many professional real estate photographers offer virtual tour creation as part of a listing photo package too.
8. Share Your Virtual Tour
Once you finish your virtual tour, your chosen software will provide a link to your tour, which is stored in the cloud. You’ll also get a code that allows you to embed the tour on websites or social media accounts. You can add this to your website and send traffic to it via paid advertising from Google or Facebook so you can promote your listing and generate real estate leads at the same time. Platforms like BombBomb let you send video emails of your tour to leads and prospective buyers.
Pro Tip: Create a branded and unbranded version of your virtual tour. Branded means your name, brokerage, and contact information will be visible to viewers of your tour. Use the branded version in places like social media. The unbranded version is used for multiple listing services since they generally will not allow agents to add any branded content to listings.
7 Software Options for Making a Virtual Tour
Picking the best virtual tour software can be a challenge since there are a lot of providers offering different versions of essentially the same thing. Look for software features that appeal to you and help you make great tours with interactive features.
Here are seven software options for creating a virtual tour:
- Kuula: Kuula offers easy-to-use software and budget-friendly features for creating sophisticated virtual tours. Cloud hosting is free for the first 100 public uploads and they offer support for best practices for filming and editing virtual tours.
- iStaging: iStaging allows users to create virtual tours and with images taken on a smartphone with a $50 lens attachment. iStaging can be used to create a live tour, create floor plans, or produce a mobile-optimized virtual reality (VR) tour. Plans begin at $5 per month.
- Asteroom: Asteroom offers a platform for agents to create high-quality, seamless virtual tours using their smartphones and their Pano Kit, which includes a lens attachment and a motorized mount to capture a 360-degree view for less than $100.
- LiveTour: LiveTour is a virtual staging company with an easy-to-use platform for creating panoramic virtual tours. If you need fewer than three tours, then you can sign up for a free account. The paid version starts at $29 per month for 15 virtual tours.
- EYESPY360: EYESPY360 offers 360-degree virtual tours with virtual staging services. They offer a free trial that includes one tour as well as a $15 pay-per-tour option and a monthly plan. The standout feature of this software is customizable hotspots that visitors can click on to get more information.
- 3DVista: 3DVista is a virtual tour and staging software with a mobile app. Uniquely, the platform allows you to create clickable floor plans. Prices range from $99 to $199 per month, depending on 3D and 360-degree features.
- Matterport: Matterport offers professional-level 3D tour creation software and cameras. Their professional cameras cost thousands of dollars, but you can use their software to create virtual tours with a variety of cameras, including your smartphone. For a comparison of Matterport and how it stacks up against the competition, read our guide on Matterport competitors and alternatives.
What Is a Virtual Tour?
The words “virtual tour” have become an umbrella term used to describe any non-static representation of a property. These can be video walk-throughs, 3D virtual tours, and interactive 360-degree virtual tours. A slideshow of listing photos set to music is not a virtual tour since it does not recreate the experience of being inside or walking through a property. Although we will focus mainly on how to create 3D and 360-degree tours, video walk-throughs are still an effective way to show buyers what it’s like to be inside a house.
Video Walk-through
A video tour is a guided walk-through of a property, often narrated by the listing agent, in which features of the home and selling points are highlighted. Videos are the least virtual of the virtual tour options, but they are the easiest to create using anything from smartphones to the most sophisticated digital video equipment. Listing videos are nothing new, but they have become an essential part of marketing and selling a property. Ryan Serhant creates video tours of his listings that are fun to watch, like this one:
3D Virtual Tour
3D virtual tours allow users to look at imagery and experience what it might be like to move through a property. They are created by photographing spaces using a panoramic camera lens and stitching together those images on special software in order to create a streaming video.
Photographs can be taken using a specialized camera or by adding a lens attachment to a smartphone. Because this type of virtual tour is created from static images, the flow from room to room can feel jumpy, like looking at something in Google street view. However, viewers can stop, turn around, and back up in each room to see details.
Here’s an example of what Zillow’s 3D Tour looks like:
Interactive 360-Degree Virtual Tour
360-degree tours offer an immersive, true-to-life experience, similar to wearing a virtual reality headset. Creating a 360-degree virtual tour requires setting up a special camera in the center of a room or area. Once activated, the camera rotates to take a high-resolution, 360-degree photo of its surroundings. Each photo is then uploaded to special software, where text, links, and other interactive multimedia content can be added to the photos, creating a dynamic experience for the viewer.
360-degree virtual tours start out like viewing a 3D model, and each click brings you into the center of a space. They offer a much richer user experience overall. Agents should include 360-degree tours as part of their real estate listing marketing plan, especially when they want to highlight a luxury property. Companies like Matterport offer cameras, apps, and proprietary software to create interactive 3D tours like these:
Bottom Line:
A virtual tour gives potential buyers the ability to experience what it would be like to visit a property in person. To create a tour, agents need to get the right equipment, shoot images, and upload those images into tour-making software. Virtual tours are best for agents who want to showcase a listing using the most advanced marketing tools, promote their properties without relying entirely on in-person showings, and compete against similar listings in their market.
Related Post

2 thoughts on “9 Steps to Create an Awesome Virtual Tour”
Comments are closed.